

Do You Need a Permit to Have Your Doors Replaced in Fort Collins, CO?
The body content of your post goes here. To edit this text, click on it and delete this default text and start typing your own or paste your own from a different source.
Planning to add square footage or gut a few rooms this year? The rules for how that work gets built have shifted. Colorado's new wildfire-resiliency requirements are rolling out across Larimer County in 2026, and the Fort Collins wildfire building code now touches everything from your roof covering to your exterior walls. If you're weighing a home addition , you'll want to know which parts of the code apply before the plans get drawn. Quick Answer: How the Fort Collins Wildfire Building Code Affects You If your property sits in a designated Wildland Urban Interface (WUI) zone, additions and significant alterations now have to meet Colorado's Wildfire Resiliency Code. In practice, that means Class A roof coverings, noncombustible gutters, ember-resistant vents, and, in higher-risk zones, ignition-resistant exterior walls. Larimer County's version took effect January 1, 2026, and local jurisdictions have to be in compliance by July 1, 2026. What Changed in 2026 Colorado adopted its first statewide wildfire building standard , and 2026 is the year it reaches homeowners. The Wildfire Resiliency Code Board adopted the code on July 1, 2025, then gave local governments until April 1, 2026, to adopt their own versions, with compliance starting July 1, 2026, or within three months of local adoption, whichever comes first. The timing isn't random. A wildfire north of Fort Collins in March 2026 forced evacuations and knocked out power to thousands, according to KUNC, a reminder that the wildland-urban interface isn't an abstraction in this part of the state. Larimer County moved early, adopting the 2025 Wildfire Resiliency Code with local amendments effective January 1, 2026. Nearby, the Loveland Fire Rescue Authority put its own 2026 code in place on April 21, 2026, per Loveland Fire Rescue Authority. This isn't the county's first recent code shift either; it follows the Larimer County 2024 building codes that already reset standards for local construction. For Fort Collins-area homeowners, the question isn't whether the code is coming. It's whether your lot falls inside a mapped WUI zone, because that decides how much of it applies to your project. How the Fort Collins Wildfire Building Code Affects Additions and Remodels Not every project triggers the full code. The threshold most homeowners hit is size: a significant alteration or addition exceeding 500 square feet can pull the work under the new requirements, per the code's adoption language. That's a real line. A modest bump-out might stay under it, while a primary-suite addition or a second story almost certainly won't. What the code asks for depends on your WUI fire intensity classification, which comes in three levels: Low, Moderate, and High. Low intensity zones require Class 1 measures: Class A roof coverings or assemblies, noncombustible gutters, and ember- and flame-resistant vents. Moderate and High intensity zones require Class 1 plus Class 2 hardening, including exterior walls built from noncombustible materials, fire-retardant-treated wood, or other ignition-resistant materials. Your classification is set by the wildfire risk map, not by how close you feel to open space, so two neighbors can land in different tiers. If you're already planning home renovation work that opens up the roof or exterior walls, folding these materials in during the same project costs far less than retrofitting later. The materials aren't exotic. Fiber-cement siding and Class A roofing are stocked locally and already sit on plenty of homes that have nothing to do with fire zones. Where your permit gets reviewed Who signs off depends on where you live. In the City of Loveland, the fire authority reviews WUI permits as part of the city process and charges a $400 fee on approval. In unincorporated Larimer County, those reviews go through the Larimer County Building Division directly. Confirm the reviewing body before you set a budget, because the review path affects both your timeline and your costs. What Most Coverage Misses About the WUI Map Most write-ups treat the code as if it blankets every home in the region. It doesn't. The trigger is the official wildfire risk map , not your ZIP code. Two houses on the same street can sit on opposite sides of a WUI boundary, and only one may owe Class 2 wall hardening. Before you assume your remodel is or isn't covered, pull up your jurisdiction's map and confirm your classification in writing. There's a second point coverage tends to skip. The code rewards work you were likely going to do anyway: a roof past its service life, siding due for replacement, an addition you've delayed. Each one is a chance to meet the standard at the margin instead of paying for a standalone retrofit down the road. Documented hardening can pay off on the insurance side too, since some Colorado insurers now factor mitigation work into their pricing. Handled right, a single project can check three boxes at once: more space, a tougher home, and a better position with your insurer. What Fort Collins Homeowners Should Do About the Wildfire Building Code The short version: find out if you're in a WUI zone, then plan around the 500-square-foot trigger before you commit to a scope. If you are covered, the smart move is to bundle the hardening into work you already had on the calendar, whether that's a remodel, an addition, or building a custom home from the ground up. Done that way, wildfire resilience becomes a line item instead of a separate, more expensive project later. We've built in Northern Colorado for more than 25 years, and we do things the right way the first time. If you're mapping out a 2026 project and want to know exactly how the code affects your plans, request an estimate and we'll walk you through what your lot and your scope actually require.
Colorado passed a law last year that changes how insurers are required to handle the mitigation work you do on your property. For homeowners in Fort Collins and Northern Colorado, home hardening upgrades now have a direct financial upside worth understanding before your next home renovation in Fort Collins . Quick Answer: What Home Hardening Fort Collins Homeowners Should Know Colorado HB25-1182, which takes full effect July 1, 2026, requires insurers to share your wildfire risk score, factor your documented mitigation work into their pricing, and offer discounts if they don't. Homeowners who have completed hardening improvements and aren't seeing it reflected in their premiums will have a legal right to appeal within 30 calendar days. What Colorado's New Wildfire Insurance Law Actually Requires HB25-1182 was signed on May 28, 2025, and takes full effect July 1, 2026, per the Colorado General Assembly . Before this law, insurers could use their own wildfire risk models without disclosing them to you or accounting for specific improvements you had made to your home. That changed. Under the law, your insurer must now: Provide annual written notice of your wildfire risk score and available mitigation discounts Incorporate property-specific mitigation actions into their pricing, or apply a discount if they don't Respond to your appeal within 30 calendar days if your documented work isn't reflected in your score The Colorado Division of Insurance (DORA) recommends documenting all mitigation work and discussing available discounts directly with your agent. What Home Hardening Fort Collins Projects Actually Look Like Home hardening focuses on the parts of your home most vulnerable to ember intrusion, which is the primary cause of structure ignitions in wildfire events, per Poudre Fire Authority . The upgrades that qualify under Colorado's framework fall into a few categories: Roofing and soffits: Class A fire-rated roofing materials and enclosed, screened soffits that block ember entry Siding and exterior walls: Non-combustible or ignition-resistant materials such as fiber cement, stucco, or treated wood composites Vents: Ember-resistant covers on attic, foundation, and crawlspace openings Decking and attachments: Fire-resistant decking materials and clearing combustibles from zones immediately adjacent to the structure If you're already planning exterior work, this is the most cost-effective window. Building to wildfire standards adds approximately 2.7% to construction costs when done as part of an existing project, per the Colorado Department of Fire Prevention and Control (DFPC). Tackling it as a standalone project means higher per-item costs and a second mobilization. What Most Homeowners Haven't Done Yet: The Free PFA Assessment Before committing to any scope of work, Fort Collins homeowners in the Wildland-Urban Interface can schedule a free, confidential Home Ignition Zone Assessment through Poudre Fire Authority. The one-hour visit identifies specific vulnerabilities and produces a written report you can share with your insurer and contractor to prioritize your project scope. PFA's Gold Letter Program goes further, providing official written verification of your completed mitigation work. That documentation carries direct weight with insurers reviewing your risk score under HB25-1182. Schedule by calling 970-416-2891 or emailing education@poudre-fire.org. What Fort Collins Homeowners Should Do About Home Hardening Now The law is in effect. Your insurer is required to respond to documented improvements. Start with the free PFA assessment to identify priorities, then address the highest-risk items through scheduled home maintenance or a planned exterior renovation. Bundling hardening upgrades with work you already need done keeps costs down and gets your documentation in order before your next renewal.
The body content of your post goes here. To edit this text, click on it and delete this default text and start typing your own or paste your own from a different source.
The kitchen is usually the first room homeowners want to update, and for good reason. A well-done kitchen remodel adds function, comfort, and real market value to your home. If you're planning a kitchen remodel in Fort Collins and want to understand permit requirements before you commit, you're asking the right question. Whether you need a permit for a kitchen remodel in Fort Collins, CO, depends entirely on what you're changing, and the answer matters more than most homeowners assume. Quick Answer: Kitchen Remodel Permits in Fort Collins, CO Most kitchen remodels in Fort Collins require at least one permit. Any project that involves electrical work, plumbing changes, gas line modifications, or structural alterations requires a permit to be filed with the city before work begins. Cosmetic updates like new cabinet doors, hardware, countertops, or paint generally don't require one. What Kitchen Remodel Work Requires a Permit The line between permitted and non-permitted kitchen work comes down to whether you're touching the systems behind the walls and under the floors. Permit required: Adding or moving electrical circuits, outlets, or panels Installing, relocating, or modifying plumbing (sink drains, dishwasher connections, water supply lines) Modifying gas lines for a range, cooktop, or oven Moving or removing walls, especially load-bearing ones Adding or modifying ventilation ductwork for a range hood Changing the kitchen's layout or overall footprint No permit needed: Replacing cabinet doors, drawers, or hardware Installing new countertops in the same location Swapping out appliances for same-size models in the same space Painting walls, ceilings, or cabinets Installing a tile backsplash If you're doing a gut remodel where everything comes out and goes back in differently, you're almost certainly dealing with multiple permits. That's completely normal. A good contractor handles all of it without you having to manage the paperwork. The Permit Process for a Kitchen Remodel in Fort Collins Kitchen remodel permits are filed through the City of Fort Collins Development Review Center. Depending on scope, your submission will include: A written description of all work being done Floor plans if the layout is changing Electrical, plumbing, or mechanical drawings for those specific scopes Inspections happen at rough-in stages before walls are closed, and again at final completion. Your contractor is responsible for scheduling all of them. If a contractor tells you permits aren't needed for a full kitchen gut and remodel, that's a red flag worth taking seriously. Why Permits Matter More Than You Think It's easy to think of permits as a hassle. They're not. Unpermitted kitchen work creates problems that tend to surface at the worst time, usually when you're selling or refinancing. Unpermitted electrical work is one of the more common reasons home sales fall apart or get delayed. Insurance may not cover a kitchen fire that traces back to wiring that was never inspected. And during a refinance appraisal, unpermitted improvements can raise questions that push back your closing date. Permits are a permanent record that the work was done correctly. That record has real value when you sell. The Part Nobody Talks About: Who's Actually Responsible Most homeowners assume the permit burden falls entirely on the contractor. In Fort Collins, the property owner is ultimately responsible for ensuring permits are pulled. If your contractor skips them and you don't catch it, you inherit the problem. Before work starts, ask to see the permit application. Once work begins, the permit posting should be visible on site. If your contractor can't confirm either of those things, follow up before work continues. Don't assume. If you're also planning a bathroom update while a contractor is already in your home, our bathroom remodel services in Fort Collins can often be incorporated into the same project scope. Bundling work can simplify permit timelines and reduce mobilization costs overall. Final Thoughts on Kitchen Remodel Permits in Fort Collins Getting a permit for a kitchen remodel in Fort Collins, CO, isn't something to work around. It's protection for your investment and proof the work was done right. J. Allen Construction Company has been handling kitchen remodels in Fort Collins and Northern Colorado since 1998. We take care of the permits, the inspections, and everything in between so you can focus on the end result. Contact us to talk through your project and get an estimate.
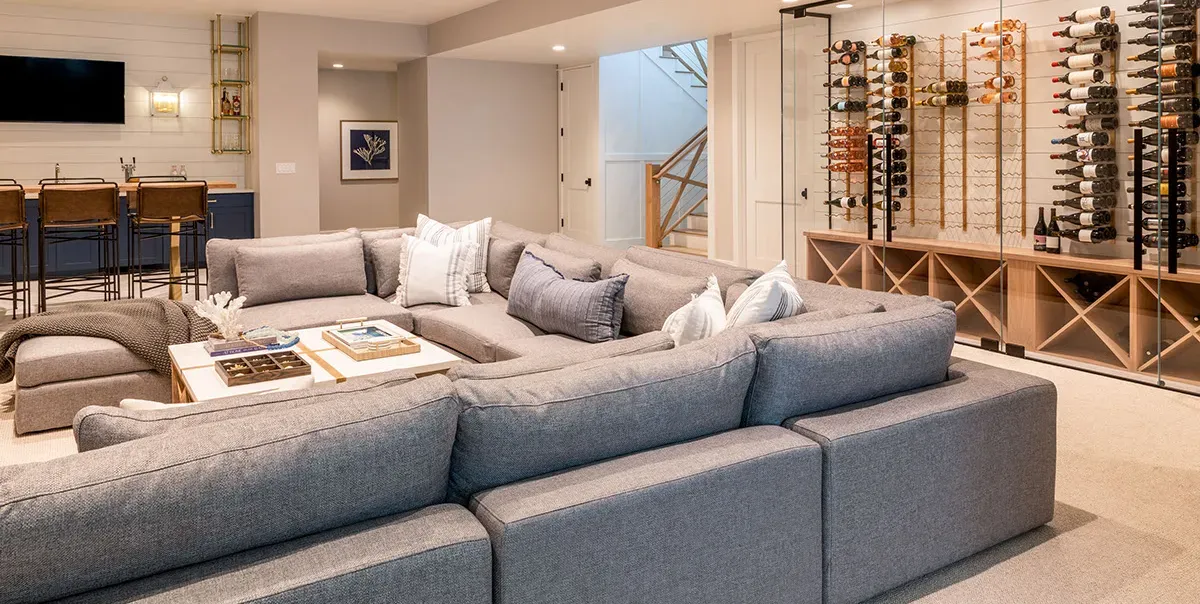
Finishing your basement is one of the smartest investments you can make in a Fort Collins home. More usable living space, added storage, higher resale value, and, in many cases, the option to create a rental unit. If you've been looking into Fort Collins basement remodel options, one question needs a clear answer before any work starts: do you need a permit for a basement remodel in Fort Collins, CO? In most cases, yes, and getting this wrong can cost you far more than the permit ever would have. Quick Answer: Basement Remodel Permits in Fort Collins, CO Most basement remodels in Fort Collins require at least one permit. Framing new walls, adding or modifying electrical circuits, installing plumbing, and changing your HVAC system all trigger permit requirements under the City of Fort Collins building code. Finishing a previously unfinished basement with framing, insulation, and drywall also typically requires a building permit, even if no mechanical systems are being added. What Triggers a Permit for a Basement Remodel Not all basement work is treated equally by the city. The general rule: anything that touches structure, electrical, plumbing, or HVAC requires a permit. Cosmetic work usually doesn't. Work that typically requires a permit: Framing new walls or partitions Adding or modifying electrical wiring, panels, or circuits Installing or relocating plumbing fixtures or drain lines Adding or modifying HVAC systems or ductwork Installing egress windows Adding a bathroom, bedroom, or wet bar Structural changes involving beams or load-bearing elements Work that typically does not require a permit: Painting walls or ceilings Installing flooring over an existing subfloor Replacing light fixtures without modifying wiring Cosmetic updates like trim, built-ins, or shelving If you're doing a full basement finish, you'll almost certainly need a building permit. These aren't just bureaucratic boxes to check. Permits ensure your project meets the safety standards that protect your family and your home's long-term value. How Basement Remodel Permits Work in Fort Collins Permits for basement remodels are filed through the City of Fort Collins Development Review Center. Depending on your scope, the submission package typically includes: A written description of all work being done Basic floor plan drawings showing new walls and room layouts Electrical, plumbing, or mechanical plans where those systems are involved Inspections happen in stages. Framing is inspected before drywall goes up. Rough electrical and rough plumbing are inspected while walls are still open. A final inspection takes place once the project is complete. For straightforward residential projects, permit approval can take one to two weeks. More complex scopes may take longer. Plan for this in your timeline before scheduling trades. What Larimer County's 2024 Building Code Changes Mean for Your Project Fort Collins adopted updated Larimer County 2024 building codes that introduced new requirements for energy efficiency, insulation standards, and electrical safety in residential projects. If your basement remodel includes any of those scopes, the updated standards apply. A licensed contractor will quote to the current code automatically, but it's worth asking directly during your estimate to confirm. What Happens If You Skip the Permit Skipping a permit might seem like a way to save time or money. It isn't. Unpermitted basement work creates problems that surface at the worst possible moments: It can halt or kill a home sale when the buyer's inspection flags it It may require tearing out finished work to bring it up to code before closing It can void your homeowner's insurance on that portion of the home It creates real liability if the work contributes to a fire, flood, or structural failure later Some homeowners figure they'll deal with it when they sell. That's a gamble that rarely pays off. Buyers, lenders, and appraisers are more likely than ever to flag unpermitted work, and retroactive permit approval, where it's even available, often still requires opening walls for inspection. The cost of doing it right the first time is almost always lower than fixing it later. For an overview of what renovation projects require permits in Northern Colorado, our Fort Collins home renovations page covers the full scope of services we provide. Final Thoughts on Your Basement Remodel Permit in Fort Collins If your basement project involves framing, electrical, plumbing, or HVAC, you need a permit for a basement remodel in Fort Collins, CO. The process is manageable when you work with a contractor who knows the city's requirements and handles the paperwork for you. J. Allen Construction Company has been building and renovating homes in Fort Collins and Northern Colorado since 1998. We pull the permits, schedule the inspections, and make sure your finished basement is done right the first time. Contact us to get started.
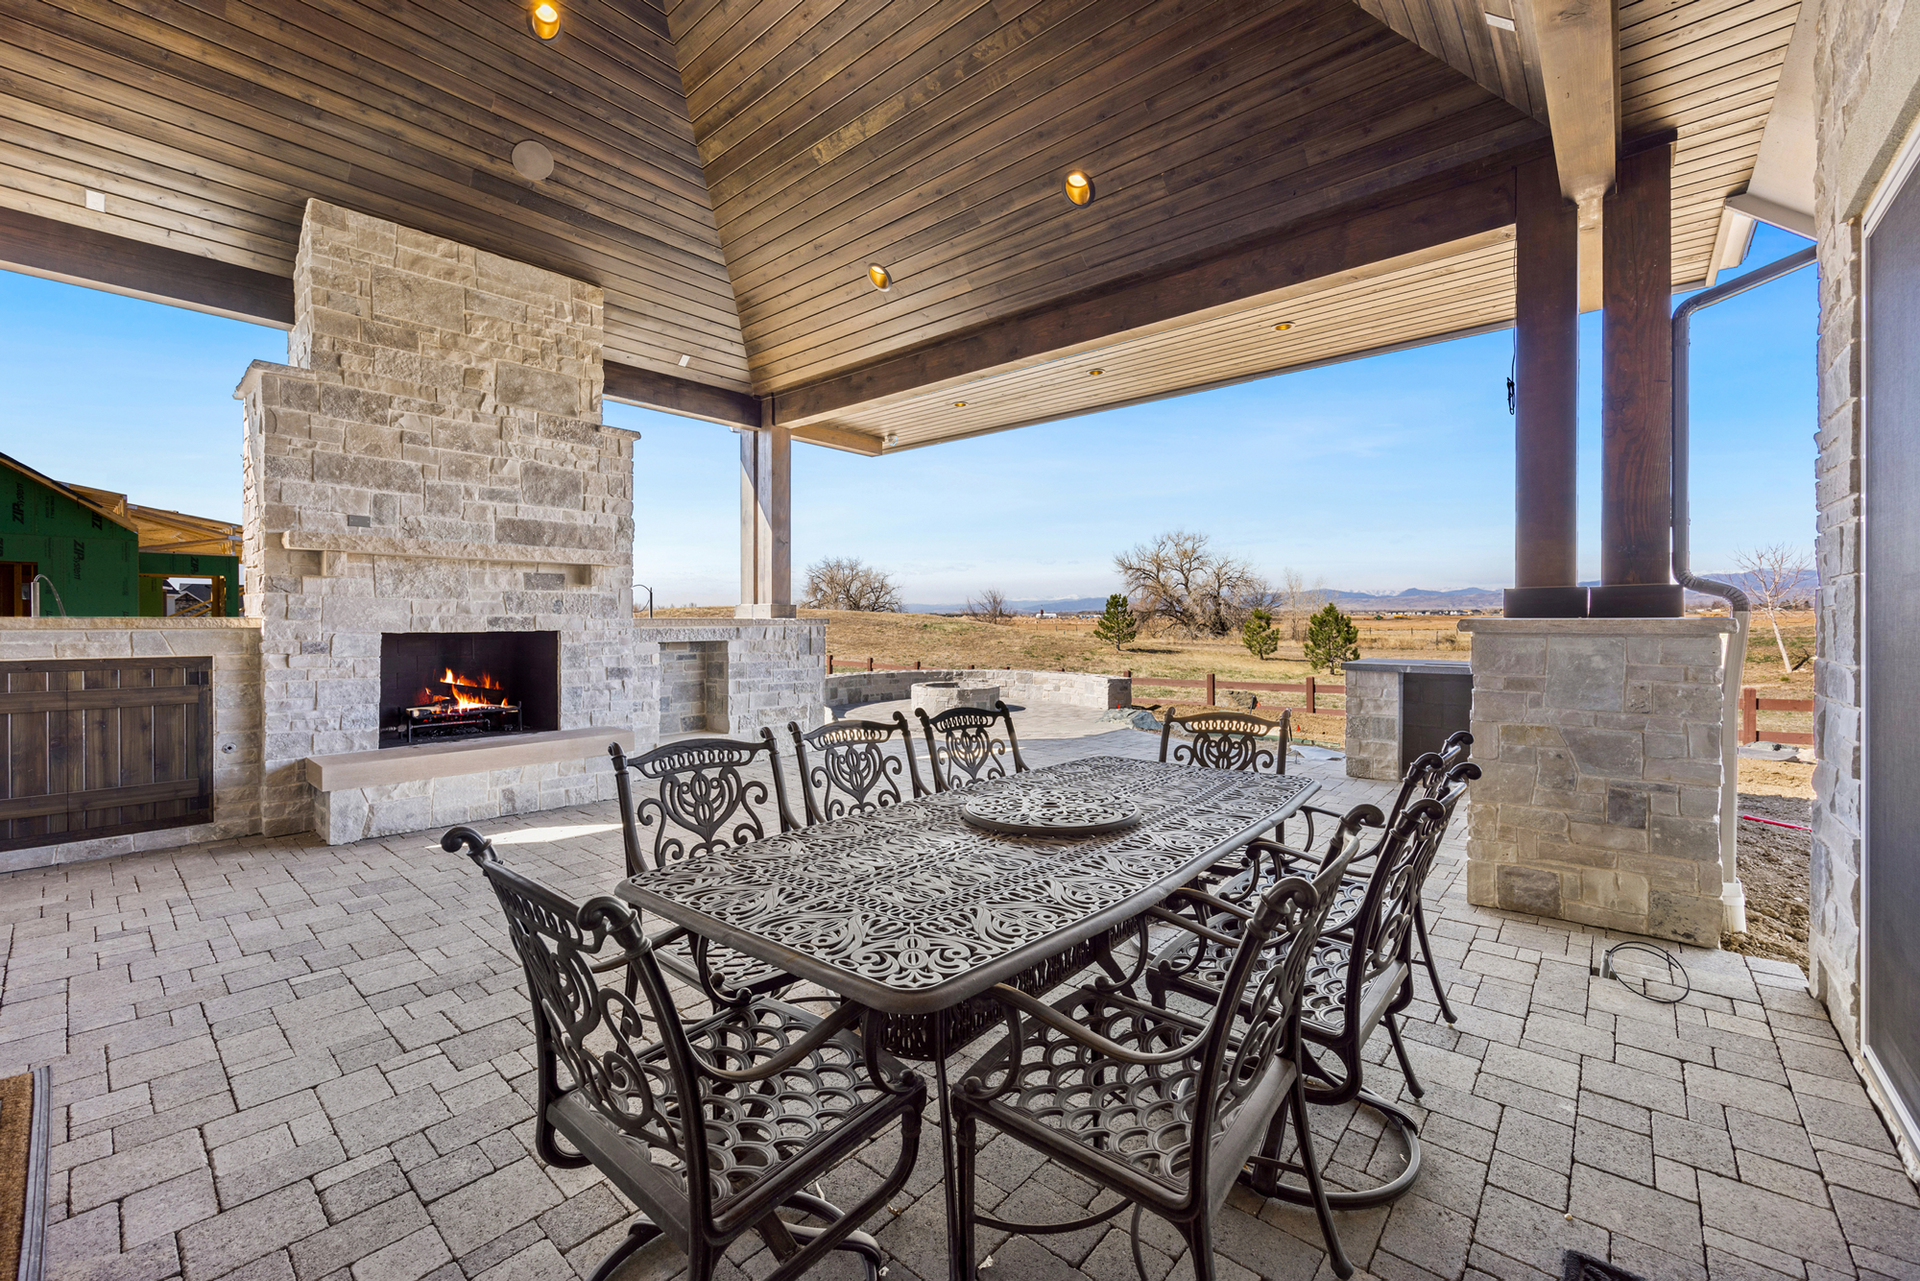
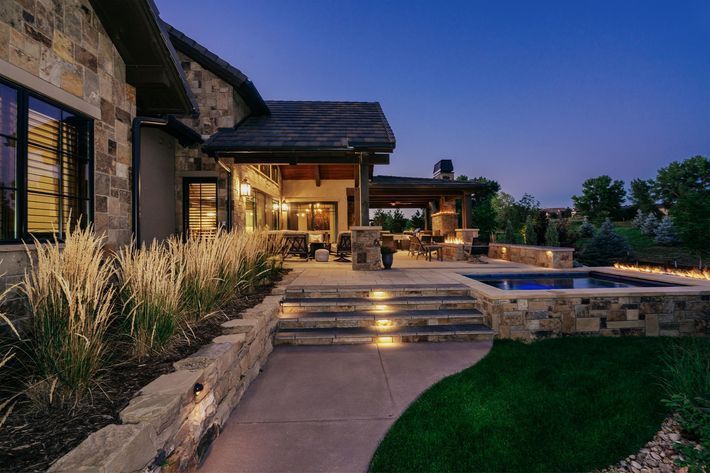
If you've spent a clear evening on the back patio or driven home from the foothills after dinner, you know what makes Northern Colorado worth the move. The sky. Real stars. The kind of dark you don't get in most of the country anymore. Fort Collins wants to keep it that way. The Night Sky Initiative is how the City does it. We've been installing outdoor and landscape lighting on Northern Colorado homes since 1998, and we plan every project around these rules. Here's what they are, and how they shape the way we design lighting on the high-end homes we build. What the Night Sky Initiative Actually Asks For The City's position is straightforward. Light only where you need it. Light only when you need it. Shield and recess fixtures. Aim them downward. Use the minimum amount of light needed. Pick energy-efficient lamps. Stay in warm color temperatures. That last one is in the building code. Fort Collins requires fully shielded, down-directional luminaires with a nominal color temperature of no more than 3000 Kelvin. That applies to new builds and retrofits. Commercial and multi-family work also gets reviewed under Land Use Code Division 5.12. Either way, your fixtures have to comply. For context: Fort Collins is already 20 times brighter than natural conditions on an average night. Out at Soapstone Prairie, it's 1.1. The City wants to protect more of the second. How That Shapes a Real Lighting Plan The good news: everything Fort Collins asks for already lines up with how a quality lighting system should be designed . Glare-free, layered, warm, intentional. Bright spots in the wrong places aren't a luxury. They're amateur work. Here's how the rules play out across the fixture types we install: Architectural and accent lighting. Uplights still have a place, used sparingly. Cross-aimed at a specimen aspen or grazing a stone chimney, with shielded fixtures and a tight beam, you get the effect without sending light into the sky. Two well-placed 200-lumen uplights beat one floodlight every time. Landscape and pathway lighting. Low-voltage path fixtures at 50 to 100 lumens, shielded, pointed at the ground. They're not supposed to be bright. They're supposed to keep your feet on the path. Hardscape and step lighting. Linear LED strips tucked under capstones, recessed into stair risers. Invisible during the day, warm and useful at night. Downlit by design, which is exactly what the code wants. Security and floodlighting. Motion-activated, shielded, aimed at the ground, on timers. A 2,000-lumen floodlight burning all night isn't security. It's a nuisance to your neighbors and the wildlife. Color temperature. Everything we spec lands between 2700K and 3000K. Warmer light flatters stone, wood, and landscaping, and it's what the code allows. Building It Right the First Time If you're planning a new build, addition, or retrofit, the lighting plan deserves the same care as the framing or the millwork. We pull the permits , design to code, and install fixtures that hold up to Northern Colorado weather and standards. Lighting fits alongside the rest of the home maintenance work we handle on these properties. Don't compromise; your home is worth the care we put into it. Ready to walk your property? Call us at (970) 568-7455 .
Good outdoor lighting does more than look nice. It keeps your family safe on icy walkways in January. It shows off the stonework you paid good money for. It adds usable hours to your patio when the sun drops behind Horsetooth. Get it right, and you barely think about it. Get it wrong, and you spend five years squinting at a porch light that's too harsh or a floodlight that lights up the neighbor's bedroom instead of your driveway. We've been installing lighting on Northern Colorado homes since 1998. Here's how we think through the decision with our clients, and how you can approach it yourself. Start with the job each fixture has to do Outdoor lighting isn't one category. It's at least four, and mixing them up is the most common mistake we see. Security lighting scares off what shouldn't be there and helps you see who's at the door. It's bright, it's motion-activated, and it points outward from the house. Path lighting keeps feet where they're supposed to be. Think low-level glow along walkways, steps, and any transition where a guest could misjudge a grade change. Accent lighting is the fun part. Uplighting on an aspen, grazing light on a stone fireplace chimney, moonlight effects under a deck pergola. This is where your house starts looking like something. Task lighting gives you useful light for grilling, reading on the porch, or finding your keys in the entryway planter. Before you pick a single fixture, walk the property at dusk and write down the jobs. Then pick fixtures for each one. Not the other way around. Match the fixture to the Colorado climate Fort Collins weather is hard on hardware. Hail one afternoon, UV cooking plastic the next, then a 40-degree temperature swing by bedtime. Cheap fixtures don't survive it. We look for cast brass, copper, or powder-coated aluminum for anything exposed. Plastic lenses crack under hail; glass holds up longer. Gasketed seals matter more here than they do in a milder climate. If the listing says "weather resistant" without a clear rating, skip it. Look for IP65 or better for fixtures that catch rain, and IP67 for anything near grade that might sit in snowmelt. For a deeper rundown of fixture categories and where each one belongs, see our guide to types of outdoor lighting . Get the brightness right, not just bright More lumens is not automatically better. A 3,000-lumen floodlight pointed at a front door is aggressive, not welcoming. A 50-lumen path light on a 40-foot driveway is invisible. The right answer depends on mounting height, the surface you're lighting, and what the fixture is meant to do. Path lights typically land between 50 and 200 lumens. Porch lights sit around 400 to 800. Floodlights range widely, 700 to 2,000+ depending on coverage area. We wrote a full breakdown of this in our piece on how many lumens you need for outdoor lighting . If you're spec'ing fixtures yourself, read it before you buy anything. Pay attention to color temperature This is where a lot of otherwise good outdoor lighting plans fall apart. Color temperature is measured in Kelvin, and a few hundred degrees changes the whole feel of your home after dark. Warm white around 2700K to 3000K looks like incandescent light. It flatters stone, wood, and landscaping. Neutral white around 3500K to 4000K is crisper and better for task areas. Anything above 5000K starts to feel like a gas station. For most residential exteriors in Northern Colorado, we stay in the 2700K to 3000K range and let the fixtures layer warmth into the evening. If you want the full explanation of why, we covered it here: what colors are best for outdoor lighting and why . Think in layers, not in dots A common trap is treating outdoor lighting as a list of fixtures to buy, instead of a composition. The houses that look best at night have multiple layers working together. A dim wash on the architecture, stronger accents on specimen trees, path lights at ankle height, and a porch light that's just bright enough to see a face. When you walk a well-lit property, you usually can't see where the light is coming from. You just see the house. Aim for that. Don't skip the permit question In Colorado, some exterior lighting work needs a permit. Low-voltage landscape lighting usually doesn't. Anything tied into line-voltage circuits, new dedicated runs, or outdoor service panels often does. This is worth getting right the first time. Unpermitted electrical work can bite you during a home sale, an insurance claim, or a future inspection. We walk through the details in do you need a permit for exterior lighting installation in Colorado . When to bring in a pro If you're swapping a porch light fixture, you probably don't need us. If you're running new circuits, mounting fixtures on a two-story façade, or designing a layered scheme across a half-acre lot, it's worth having a licensed crew handle it. We stay current on Fort Collins code, pull the permits, and make sure the whole setup is built to survive Northern Colorado weather. You can see the full scope of what we handle on our indoor and outdoor lighting installation page, and lighting fits alongside everything else we cover under home maintenance . Final Thoughts on Choosing Outdoor Lighting Write down the jobs each fixture has to do. Buy for the climate. Get the lumens right. Keep the color temperature warm. Layer the light. Don't skip the permit. And if it's a bigger project, don't compromise; your home is worth the care of a crew that does this for a living. Ready to talk through a plan for your property? Give us a call, and we'll walk it with you.
Lumens are the honest measure of how much light a fixture actually puts out. Watts used to be the shorthand, back when everything was incandescent, and a 60-watt bulb meant something specific. LED changed that. Now two fixtures with the same wattage can produce wildly different amounts of light. So lumens are what matter. The question is how many you need. The answer is: it depends on what the fixture is doing, where it's mounted, and what it's lighting. Here's the framework we use on every Northern Colorado install. Short Answer: How many lumens you’ll need Path lights 50 to 200. Step lights 12 to 100. Porch sconces 400 to 800. Floodlights 700 to 2,500+, depending on coverage. Uplights 100 to 400. Downlights 200 to 600. Hardscape 30 to 150 per foot. String lights 40 to 100 per bulb. Size to the job, pair high-output fixtures with motion sensors, and remember that mount height and aim matter as much as raw output. Path and walkway lights: 50 to 200 lumens Path lights are not supposed to be bright. Their job is to show you the edge of the sidewalk, not to light the neighborhood. Anything above about 200 lumens at ankle height starts feeling harsh and makes the space less inviting. For most residential paths, we use fixtures in the 50 to 100 lumen range, spaced 8 to 10 feet apart. Brighter isn't better. A gentle wash of light with dark space between fixtures reads more naturally than a line of glowing orbs. Step and deck lights: 12 to 100 lumens Recessed step lights live in a tiny range. You want enough light to see the edge of the tread and the drop to the next step, and nothing more. 12 to 40 lumens per step light is typical for indoor stairs, and 40 to 100 lumens for outdoor steps where ambient conditions can get darker. Over-lighting a stair is a real problem. Glare on an icy step is worse than a slightly dim one, because your eyes adjust poorly to hot spots in a dark setting. Entryway sconces and porch lights: 400 to 800 lumens This is the fixture that greets people. It needs to be bright enough to see a face, read a package label, and make the entry feel welcoming, but not so bright that it's blinding or washes out the architecture. Most of the porch and sconce fixtures we spec fall between 400 and 800 lumens. If you have two sconces flanking a door, aim for 400 to 600 lumens each and let them work together. A single larger fixture over a door usually lands closer to 800. If the color temperature is wrong, even the right lumens will feel off. We cover the color side in detail in what colors are best for outdoor lighting and why . Floodlights and security lights: 700 to 2,500+ lumens Floodlights have the widest range because they cover the widest spread of jobs. A small floodlight covering a backyard patio needs far less output than a dusk-to-dawn security light covering a long driveway. Rough ranges we use: Small patio or yard coverage, 700 to 1,300 lumens. Medium residential driveway or side yard, 1,300 to 2,000 lumens. Large property, commercial-style coverage, or long driveways, 2,000 to 2,500+ lumens. Always pair higher-lumen floodlights with motion sensors. Running a 2,000-lumen light all night is wasteful and harsh. Spotlights and uplights: 100 to 400 lumens each Uplights on trees and architectural features don't need to be punishing. 100 to 300 lumens is usually plenty for a tree up to about 20 feet. Larger specimen trees or tall stone chimneys can go up to 400. The mistake people make is thinking uplights need to match interior accent lighting in brightness. They don't. Outdoor ambient light is much lower, and your eyes adjust. A 200-lumen uplight at night reads like a spotlight. Downlights and moonlighting: 200 to 600 lumens Mounting downlights up in a tree or under an eave to cast light downward is one of the most elegant outdoor lighting techniques. Lumens need to be moderate, between 200 and 600 for most applications. The effect depends on distance to the ground and the branches the light filters through. Hardscape lights: 30 to 150 lumens per foot Linear LED hardscape fixtures are usually measured in lumens per foot rather than total output. A typical range for retaining walls, cap stone lighting, and pergola strips is 30 to 150 lumens per foot, with most residential applications sitting around 60 to 100. String lights: 40 to 100 lumens per bulb Market-style string lights are atmosphere, not illumination. Bulbs in the 40 to 100 lumen range (equivalent to about 5 to 10 watts in LED terms) give you that warm patio feel without washing out other lighting. A few principles that save trouble later Warm color temperatures matter more than raw lumen count. A 400-lumen fixture at 2700K feels more inviting than an 800-lumen fixture at 5000K, even though the second is technically twice as bright. Mount height changes everything. A 1,000-lumen floodlight 8 feet up covers a small area. The same fixture at 20 feet spreads the light across a much wider patch, so each square foot gets less. When you're sizing, think about coverage area, not just raw output. Glare is the enemy. A fixture that puts out the right lumens but sends half of them directly into your eyes is worse than a dimmer fixture aimed correctly. Shielded fixtures, downward aim, and thoughtful placement beat brute-force brightness every time. Layer, don't stack. Resist the urge to buy brighter fixtures when you can instead add a second, lower-lumen fixture for balance. Two 400-lumen sconces on a porch are almost always better than one 1,000-lumen fixture. Tying it into the broader plan Lumens are one piece of the outdoor lighting picture. Fixture type, color temperature, placement, and permitting all matter. Our guide to choosing outdoor lighting walks through the whole decision, and our rundown of types of outdoor lighting shows where each category belongs. If you're wiring new circuits or installing fixed exterior fixtures in Colorado, a permit is often required. We break down what triggers one in our guide to permit requirements for exterior lighting in Colorado . Final thoughts on how many lumens you need for outdoor lighting We've been handling lighting jobs across Northern Colorado since 1998. You can see what we cover on our indoor and outdoor lighting installation page, and lighting rolls in with everything else we handle under home maintenance . Get the lumens right, and your house reads the way it's supposed to after sunset. Get them wrong, and you'll notice every night.
Walk through any well-designed Northern Colorado property after sunset, and you'll notice something. The outdoor lighting doesn't feel like lighting. It feels like the house just looks that way. That's because the people who planned it used the right type of fixture for each job, then got out of the way. There's no single "outdoor light." There's a toolkit, and each tool has a purpose. Here's how we break it down when we're planning a job in Fort Collins, Loveland, or anywhere in our service area. Path and walkway lights These are the shorter fixtures you see spaced along sidewalks, garden edges, and driveway borders. Most sit between 18 and 24 inches tall, throw a soft pool of light downward, and run on low voltage. Good path lights keep feet where they should be without blinding anyone. Common mistake: spacing them like airport runway lights, four feet apart. Real path lighting is closer to 8 to 10 feet, with enough throw between fixtures to read as continuous rather than a string of dots. Step and deck lights Recessed step lights are small, usually LED, and mounted into the riser of a staircase or the side of a deck post. They're the quiet workhorse of outdoor lighting. No glare, no wasted light, just enough to see the edge of the next step. On a Colorado deck that gets real winter use, step lights are worth the install every time. Ice plus darkness plus a misjudged stair is a recipe for a bad night. Wall-mounted sconces and lanterns These sit on either side of garage doors, entry doors, and sometimes along long exterior walls. They're both architectural and functional. A pair of properly sized lanterns on an entry changes the whole face of a home. A common problem is scale. Most builder-grade lanterns are too small for the door they flank. We tell clients to measure the door height and aim for fixtures roughly a quarter of that height, sometimes more on a two-story entry. If you're not sure how to think through it, our guide to choosing outdoor lighting walks through fixture selection in detail. Floodlights and security lights Floodlights throw a wide, bright beam and are usually mounted high. Security-specific versions add motion sensors and sometimes cameras. They're not subtle, and they're not supposed to be. The trick with floodlights is aim and glare. A floodlight pointed slightly down and away from the property line lights your yard. The same fixture pointed level lights your neighbor's bedroom. We see this one on almost every walkthrough. Point the light where you want it, not where the manufacturer mounted the bracket. Security lighting should also be paired with a motion sensor so it's only running when something triggers it. Permanent floodlighting is rarely the answer, and it isn't kind to anyone trying to sleep. Spotlights and uplights Spotlights cast a narrow, focused beam. Uplights are spotlights aimed at the ground pointing up, typically used on trees, columns, stone features, and architectural details. This is where outdoor lighting starts to feel intentional. A well-placed uplight on a mature aspen in the front yard does more for curb appeal than almost any other single fixture. Two of them, cross-aimed, do even more. Just don't overdo it. Three uplights per tree is usually plenty. Downlights and moonlighting Downlights mount high in trees or under eaves and cast light downward, often through branches. The effect is called "moonlighting," and when it's done right it looks like the moon is sitting just above your yard. This is one of our favorite techniques on larger properties. It lights a big area without any fixture being visible at eye level. Expensive to install. Worth it. Hardscape lights These are small, linear LED fixtures built into or mounted on retaining walls, stair treads, pergolas, and capstones. They're nearly invisible during the day and add a warm line of light at night. Hardscape lighting does a lot of heavy lifting for backyard entertaining. If you spent money on a stone patio or a built-in fire pit, it should have hardscape lighting integrated into it. String lights and market lights The café-style bulbs strung across a patio or pergola. They're not serious architectural lighting, but they make a space feel warm and used. Fine for a patio. Not a substitute for real path or task lighting. In Colorado, look for bulbs rated for outdoor use and shatter-resistant housings. Hail doesn't negotiate with glass string lights. In-ground and well lights These sit flush with the ground, aimed up. They're used for uplighting walls, facades, and large trees when you don't want a visible fixture. The installation is more involved because they have to be sealed against water, and in our climate, they need to handle snowmelt and freeze cycles too. A few rules that cut across all of them Pick warm color temperatures, 2700K to 3000K, for residential exteriors. We explain the reasoning in what colors are best for outdoor lighting and why . Size the brightness to the job. Not every fixture needs to be bright. Our lumens guide breaks down the numbers by fixture type. Before you buy line-voltage fixtures or plan a larger system, check the permit rules. In Colorado, exterior electrical work often triggers one. Our rundown on permit requirements for exterior lighting in Colorado covers what to expect. When to call a crew Some of this you can do yourself. Swapping a sconce, adding a string of solar path lights. Fine. But when you're running new circuits, trenching cable, or trying to design a layered composition across a whole property, the job gets harder fast. We've been installing lighting on Northern Colorado homes since 1998. You can see the full picture of what we handle on our indoor and outdoor lighting installation page, and lighting is one piece of everything we cover across home renovations and home maintenance . Pick the right type for the job, set it up to survive the climate, and you'll have a property that works after dark for a long time.
Two houses on the same block, same style, same fixtures. One feels inviting at night. One feels like a parking lot. The difference is usually color temperature. Color temperature is how warm or cool a light source looks, measured in Kelvin. Lower Kelvin values read as yellow or orange. Higher values read as white or blue. On the packaging it'll be labeled something like 2700K, 3000K, 4000K, or 5000K. A few hundred degrees shifts the whole feel of your home after dark. Here's how to think through it, and what we use on Northern Colorado jobs. The short answer For residential exterior lighting , we stay in the 2700K to 3000K range almost every time. Warm white. That's the sweet spot for flattering stone, wood, brick, landscaping, and skin tone, which matters when you're entertaining on a patio or greeting someone at the door. If you're not sure where to start, start there. 2700K on most fixtures, 3000K if you want something slightly crisper. We'll get into the exceptions in a minute. Why warm white works outside Outdoor environments already trend cool. Moonlight is cool. Snow is cool. Shadows read blue. When you drop a warm-temperature fixture into that setting, it creates a contrast your eye reads as welcoming. The stone of a chimney looks richer. Wood siding looks alive. Foliage looks green instead of gray. Cooler light, 4000K and above, flattens that contrast. It makes the house feel utilitarian. Useful for a loading dock. Less useful for the front of a home that your family walks up to at night. There's also a psychological layer. Warm light signals rest and home. Cool light signals alertness and work. Your front yard is not supposed to feel like an operating room. When to use 3000K instead of 2700K 3000K is still warm, but a touch crisper. We'll reach for it when: The exterior uses a lot of cool-toned materials, gray stone, white trim, modern steel accents. 2700K can look too yellow against a cool palette. 3000K sharpens it up. The architecture is modern or contemporary. Very warm tones on a sleek modern façade can read dated. 3000K threads the needle. You want slightly more color accuracy for task areas, like a grill station, outdoor kitchen, or detailed landscaping you want to see clearly. Where 4000K has a place 4000K, sometimes called "cool white" or "neutral white," has a narrow role outside. Security lighting. If the whole point of a fixture is to deter and illuminate a threat, you want clarity, not warmth. 4000K reads as alert, and security cameras often capture better footage under it. Functional service areas. A detached garage, a workshop, a utility side of the house. Places where you're doing tasks rather than hosting. Commercial or quasi-commercial exteriors. A short-term rental property with parking might warrant cooler lighting for visibility. Even then, we'll usually keep 4000K out of sightlines from the main living areas. A cool-temperature floodlight on the back of a garage is fine. The same fixture pointed at the patio will ruin the patio. Why 5000K and above almost never belongs on a home 5000K and higher is marketed as "daylight" and for years was the default on builder-grade LED fixtures because it produces the highest lumen output per watt, so it tests well on the spec sheet. It also makes your house look like a gas station. 5000K in a residential exterior context is harsh, clinical, and bluish. It doesn't flatter anything except maybe a solar panel array. We occasionally see it on older security floods, and we almost always swap those out when we're doing a lighting update. Color rendering index (CRI) matters almost as much Kelvin isn't the full story. Color rendering index, CRI, is a measure of how accurately a light source shows the colors of the objects it lights. A score of 100 matches natural daylight. A score of 70 is what you'd expect from cheap LED. For residential outdoor lighting we look for CRI of 90+. Lower than that and reds start looking muddy, greens look washed out, and the whole yard reads like a photograph that's been processed poorly. Spec sheets don't always list CRI, but it's worth asking. The difference between a 70 CRI and a 90 CRI fixture at the same color temperature is significant. Consistency across fixtures One of the subtle things that makes a well-lit property look designed is that every fixture reads the same temperature. If your path lights are 3000K, your sconces are 2700K, and your floodlight is 5000K, the whole system feels off even if each fixture is fine on its own. When we're spec'ing a job, we match color temperature across all exterior fixtures within visible range of each other. It's a small discipline that makes a big difference. A note on smart bulbs and adjustable fixtures Some exterior fixtures now offer adjustable color temperature, usually across a 2200K to 5000K range. They're useful for flexibility, and convenient if you want the option to run warmer during dinner and cooler during a security event. Quality on these varies. The cheap ones shift colors oddly across the range and tend to fail faster in Colorado weather. If you're going this route, stick with reputable brands rated for exterior use. How color ties into the rest of the plan Color temperature is one layer of a good lighting plan. Lumen output, fixture type, aim, and placement all matter too. Our outdoor lighting selection guide walks through the whole decision, and our rundown of types of outdoor lighting shows how each fixture category fits. If you're still dialing in how bright each fixture should be, we covered that in how many lumens you need for outdoor lighting . And if you're doing more than a swap of a single fixture, check whether your project needs a permit. We explain what triggers one in permit requirements for exterior lighting installation in Colorado . Final thoughts on choosing the right outdoor lighting color 2700K to 3000K for almost every residential exterior. 4000K reserved for security and service areas. 5000K and up, basically never. CRI of 90+ whenever you can get it. Consistent color across all fixtures within sight of each other. We've been handling this kind of work across Northern Colorado since 1998. The full scope of our lighting services lives on our indoor and outdoor lighting installation page, and lighting fits in with everything else we cover across home maintenance and home renovations . Pick the right color and your house reads the way you want it to, every night.